Ram Promaster Van Custom Cargo Net
The first time we took a crack at this Ram Promaster Custom Cargo Net, we ended up with the following design (couldn’t find the original drawing).
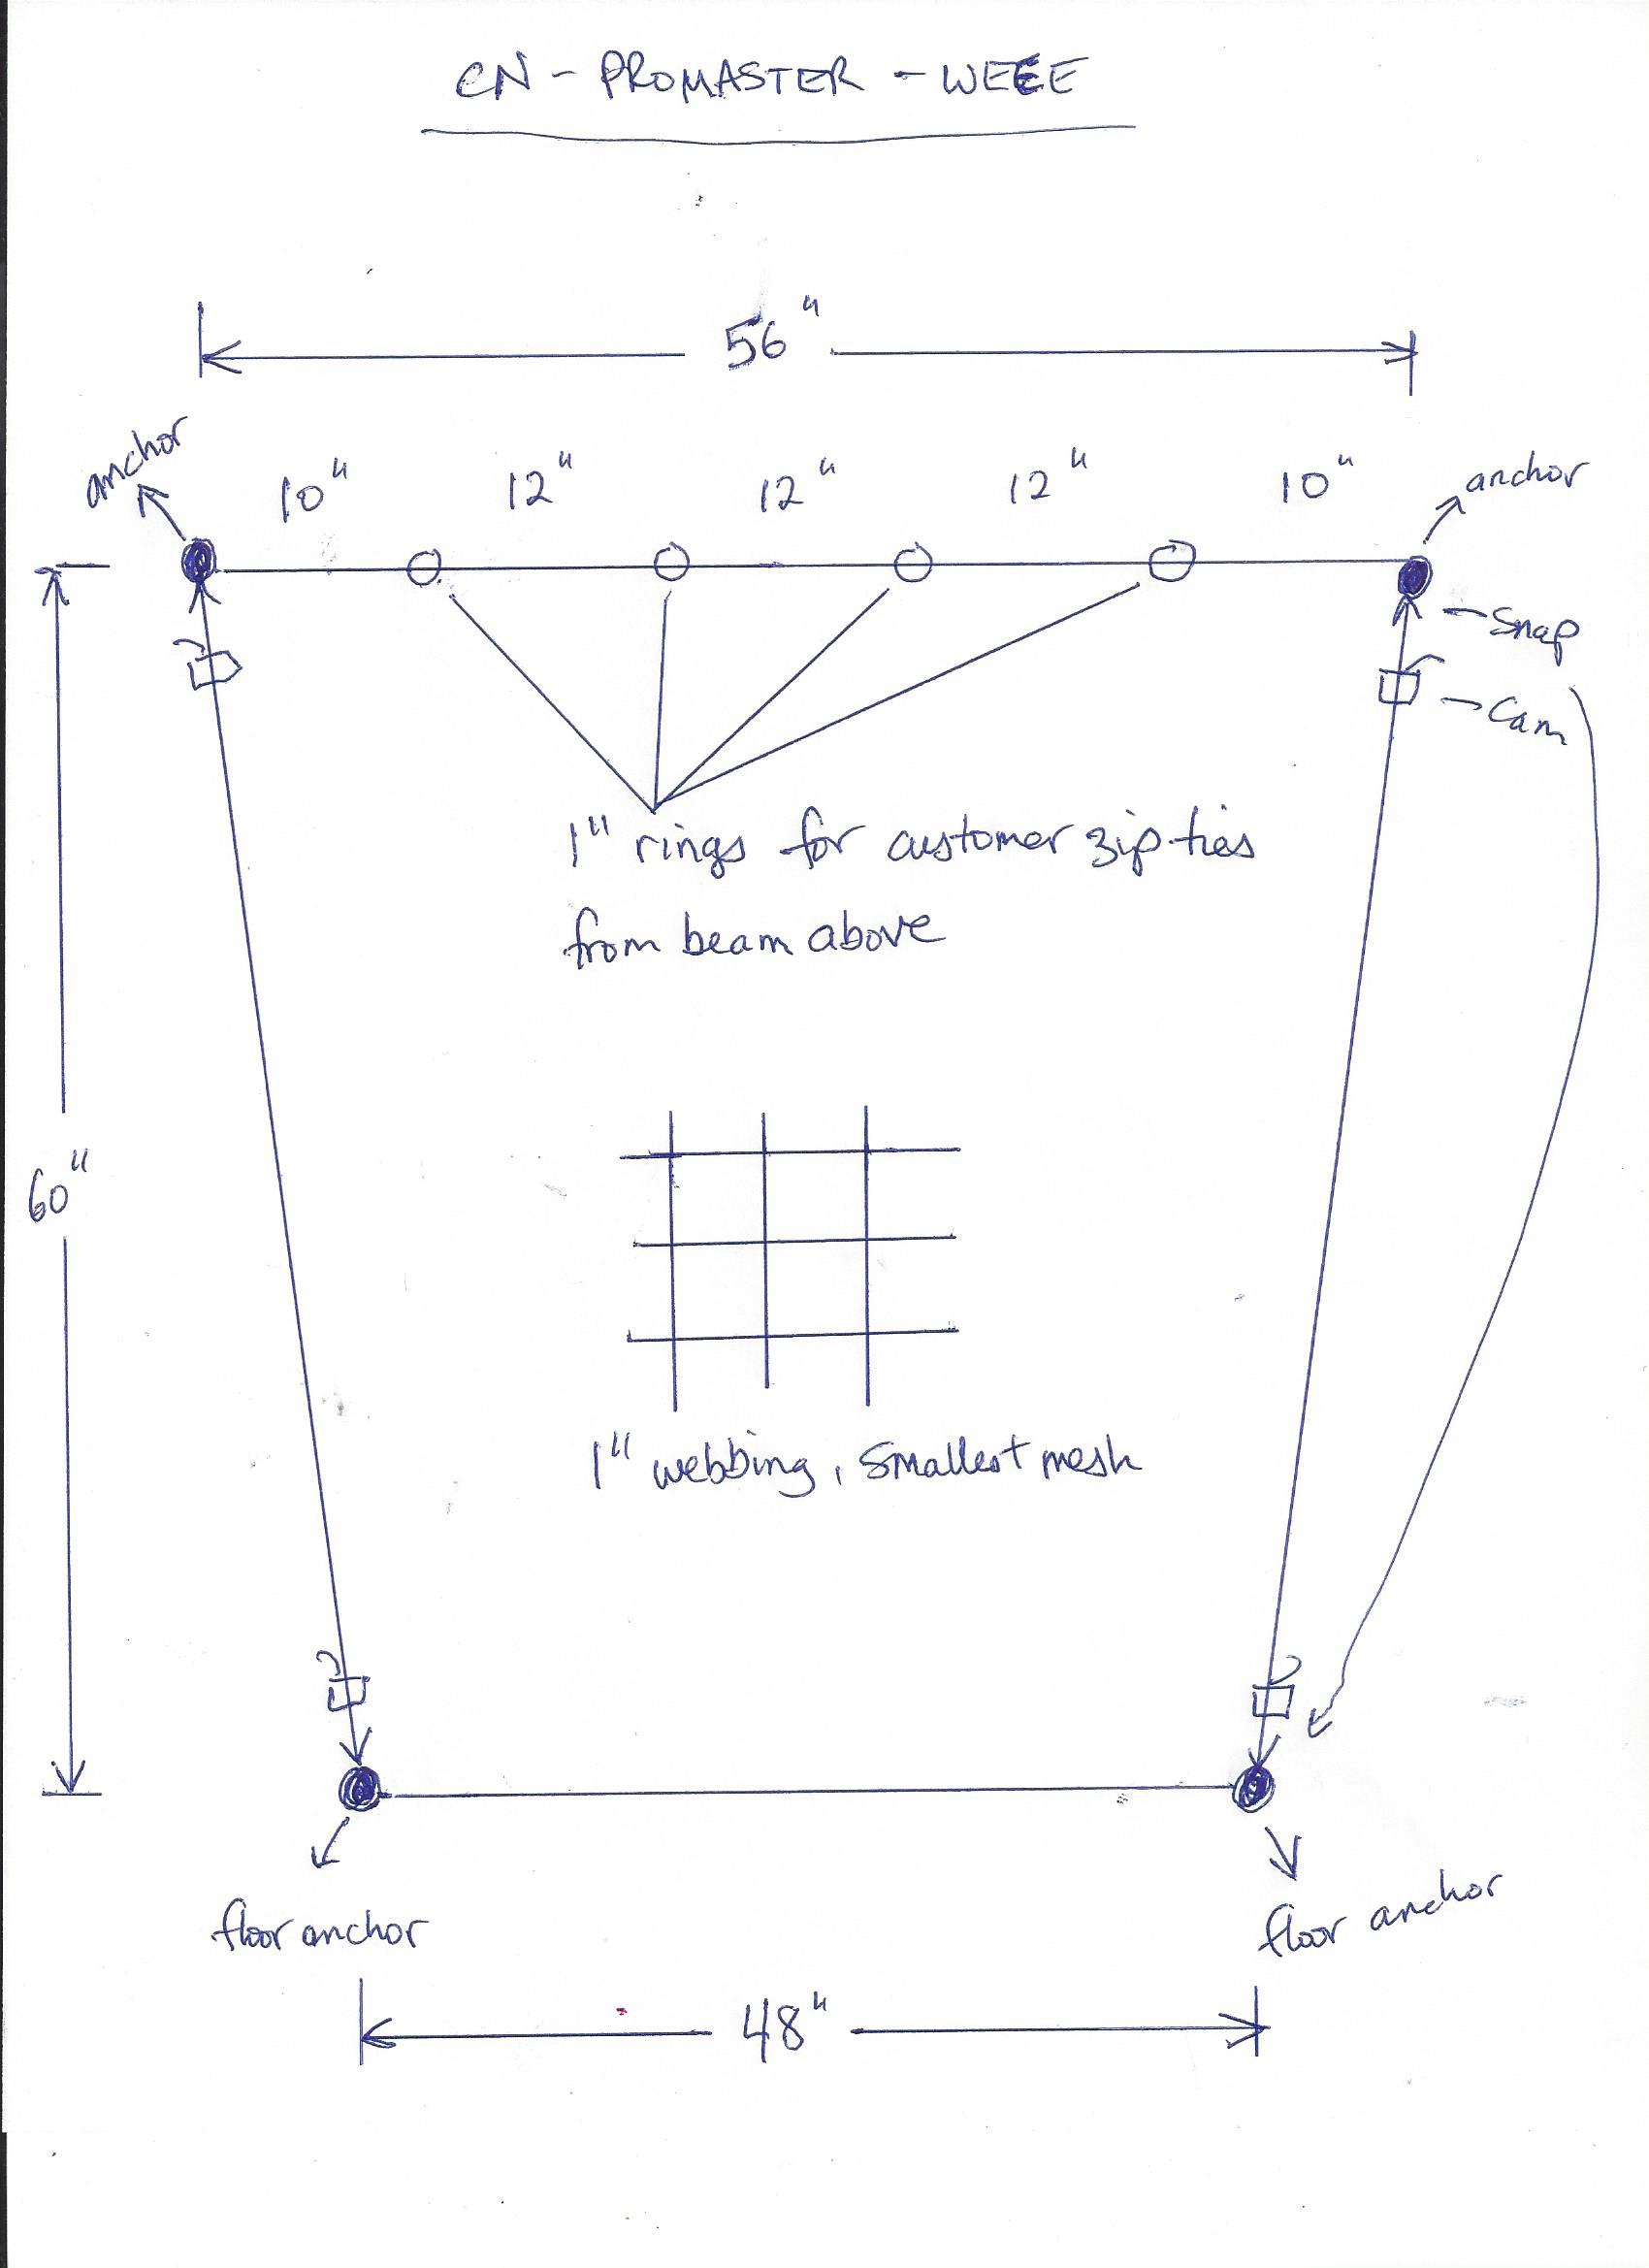
The second time we went at the Ram Promaster cargo net, our customer gave us slightly different measurements (see attached) and we decided to eliminate the additional top 4 rings for zip ties that the first customer wanted for extra security. We added multi-directional rings near the top for the top adjustable straps to attach to in order for the customer to crank that top area down nice and tight. We also have adjustable straps at the bottom just without the rings because we can be pretty exact with our sewing and we’re just going straight down on these straps.
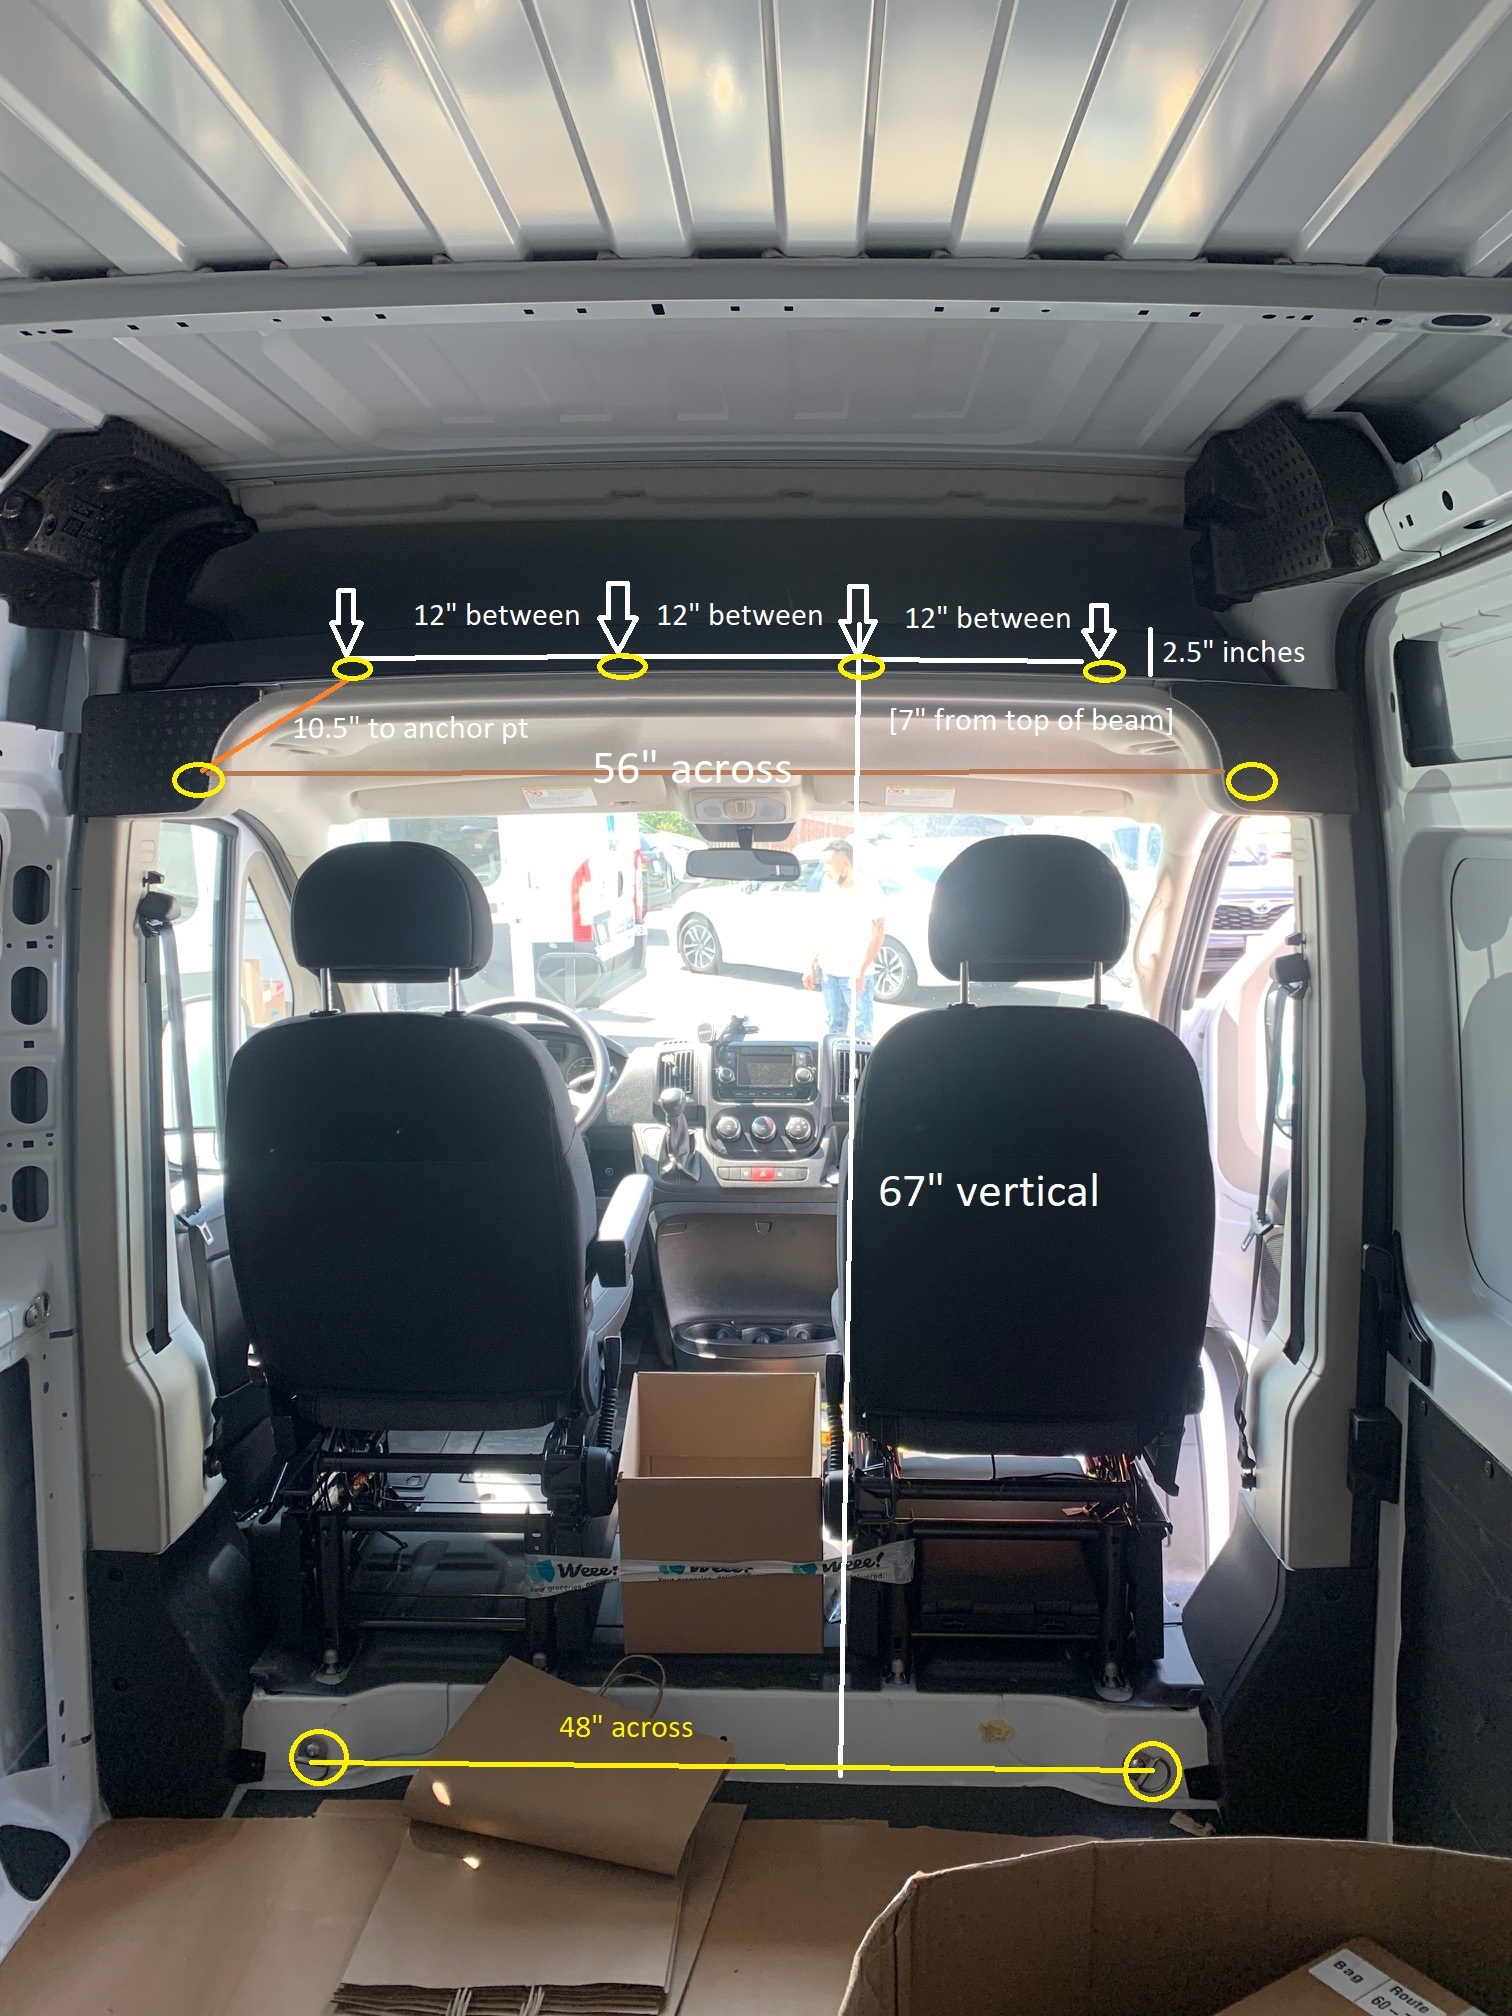
The floor anchors on the Ram Promaster are approximately 47” apart and up above you have plenty of room it seems to mount our custom D-ring anchors. You could hypothetically put additional anchors up on the top beam slightly above the net and we could sew in 1” steel rings onto any cross sections at the top, but it may leave you taking forever to remove the net and zip ties from those extra anchors up top, but we can do it if you like. You just have to give us those exact locations based on the engineering drawing that we do depending on your anchor points and cargo net strap cross-section locations.
Here are the most important issues to take into consideration with a Ram Promaster Custom Cargo Net:
- You need to double check your vertical measurement from floor anchors to your anchor points on the top. The pics you texted to me don’t show it. I’m assuming it’s 60” from where you’ll install your anchor on top to the floor anchor as that was our previous customer’s with a Promaster vertical measurement but always like to double check.
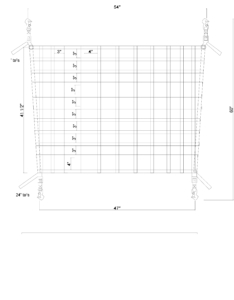
- We decided to change the design slightly which will work out much better due to uneven additional anchor points at the top. We put multi-directional rings/straps at the top instead of the bottom and we eliminated the additional rings for zip ties at the top which will make removal time just seconds. We don’t think you’ll need those given you should be able to crank down tight at top. In this case you’ll only need 2 anchors for each net at the top which we’ll send along for you to install. You also have adjustment at the bottom but those will pretty much go straight down so we didn’t see a need for multi-directional rings on the bottom.
- You’ll see there is a minimum strap length of approx. 9.25”, so the body of the net will end up being 41.5”. Please check all measurements to make sure it will work for you. I recommend printing out this drawing and taking a tape measure to the vehicle to imagine the net.
- Typically we do black webbing with white stitching. If you’d like black stitching/thread, please advise. Also, we have other colors if you want to explore a different color, I just have to see what we have in stock.